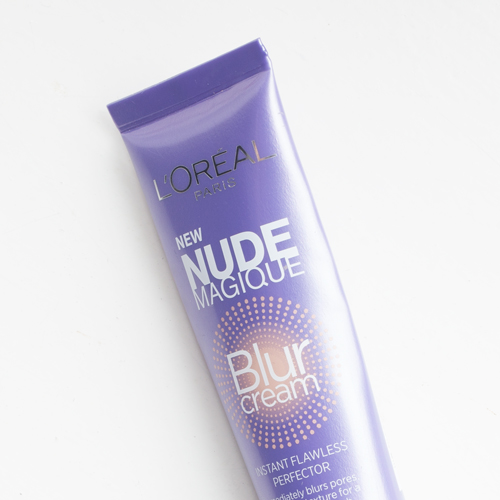
1. Whenever I'm getting ready for a night out where I know I might need my makeup look to last for a long time, I start with a sillicone-based primer. I don't have oily skin at all but I find it helps the foundation apply smoothly and stick longer. My current go-to is the L'Oreal nude magique blur cream. It's a dupe for the Benefit Porefessional, but it's cheaper and doesn't have nasty ingredients. Win-win!

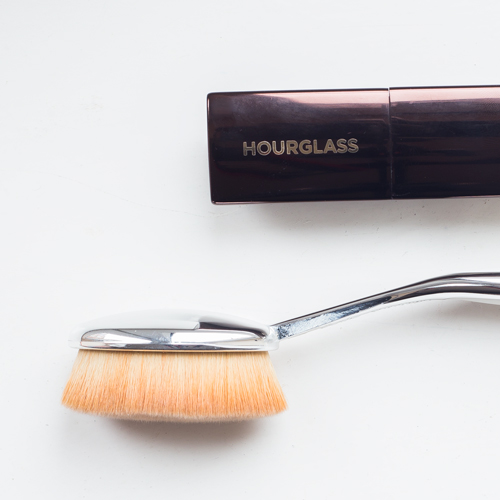
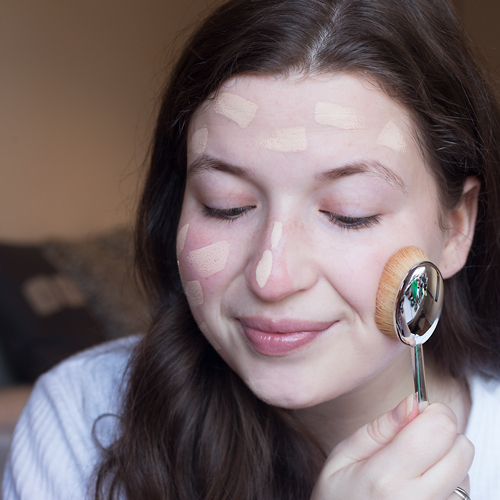
2. my foundation of choice lately if I'm looking for full coverage is the Hourglass Vanish Seamless Foundation. I have to admit it took me a while to fall in love with this product, as I found it really emphasized my skin texture at first and couldn't make it work! I then realized that paired with a sillicone-based primer, it does the trick! I like to apply it by dotting it around my face and blending it with my Artis brush which was my big splurge of last year. That brush is awesome but if you don't have the budget, many many companies have their own dupes now.
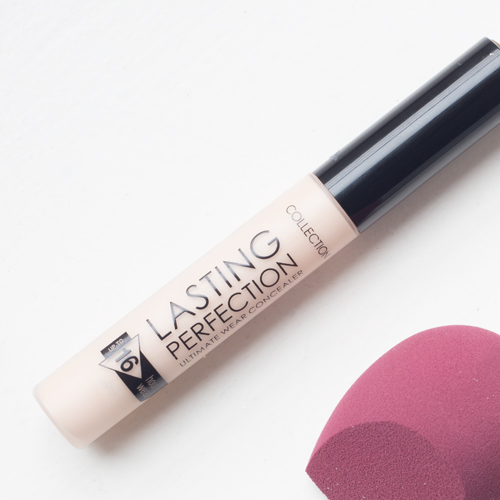
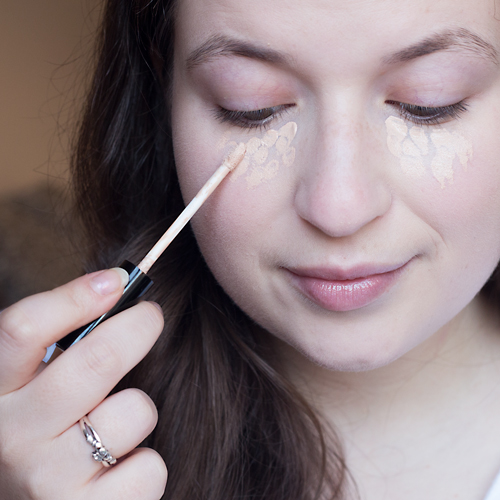
3. On to concealer! My favourite concealers are actually from the drugstore. The one I'm using for this look is the Collection Lasting Perfection that I discovered thanks to the amazing Fleur de Force! It costs next to nothing but looks great, doesn't crease and last all night! To make sure it stays put during the night, I like to set my work with a powder like the Hourglass Ambient Lighting Powder, the one I used for this look is the shade Mood Light.
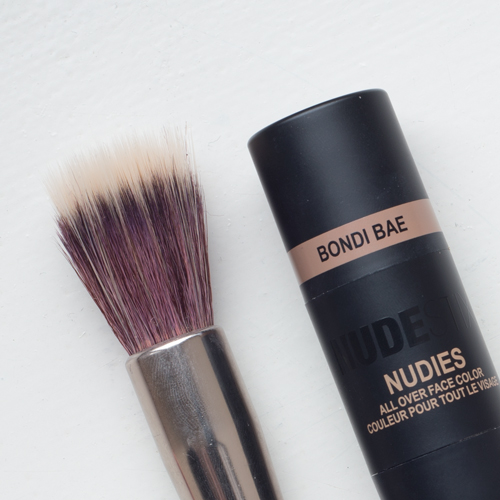
4. Before I move on to powder products, I have a few more cream products to use. I like to bronze up and kind of pre-contour my face with a cream bronzer, I find it looks a bit more natural. The one I'm using here is the Nudestix Matte in Bondi Bae. Recommended by the lovely Jamie Paige. I was always afraid of cream bronzers because they are a bit more tricky to work with, but this one blends like an absolute charm! I apply the product to the edges of my face, under my cheek bones and on the sides of my nose. I use a simple stippling brush and try to stick to circular motions!
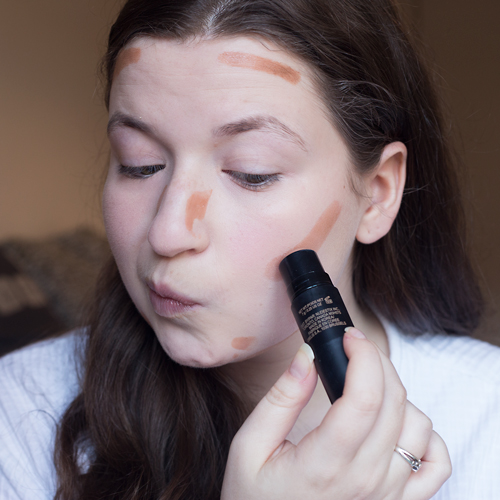
5. Because this is the holiday season, and there's never enough sparkle and glow, I'm going to add a little cream highlight to the high points of my cheekbones using only my fingers. The Benefit Watt's up has been a favourite of mine for years.

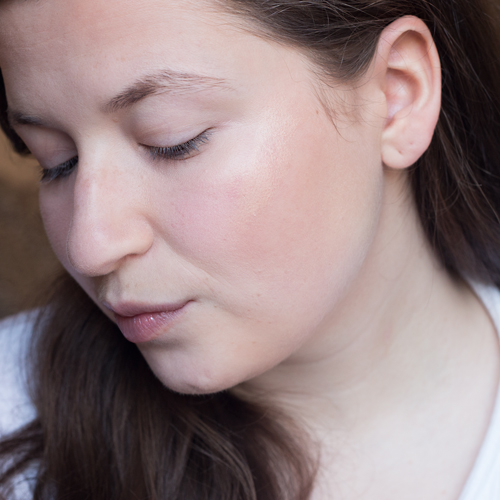
6. On to powder products! I like to fine tune my contour by accentuating my cheekbones. I'm on the hunt for an eco friendly contour powder so for today I will use my Benefit Hoola. This is technically a bronzer but the colour works very well for contouring too! I like to apply my cheek contour with an angled brush like the Eco Tools Skin Perfecting Brush.

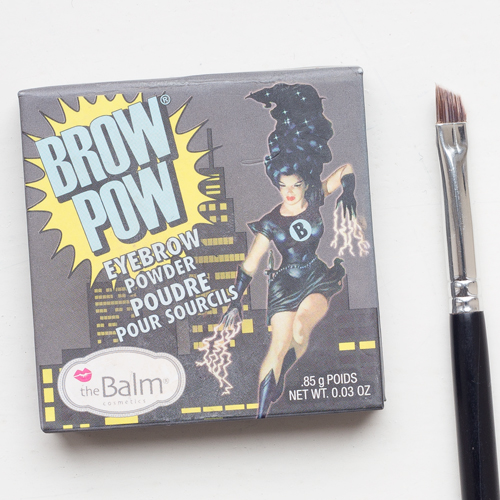
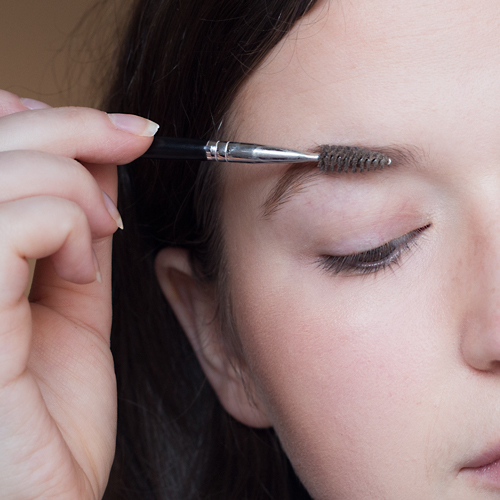
7. What I do with my eyebrows changes constantly, but I like them to look natural. They are quite sparse so I do like to fill them in a little. I love using brow powder as I find it has a much softer result, I'm currently using the TheBalm Brow Pow and I love love it! I apply the powder in short strokes with my ABA Duo Brush #12 and brush through them with the spoolie end afterwards. I then set everything in place using a clear brow gel. I'm using my Pixi Brow Tamer at the moment.
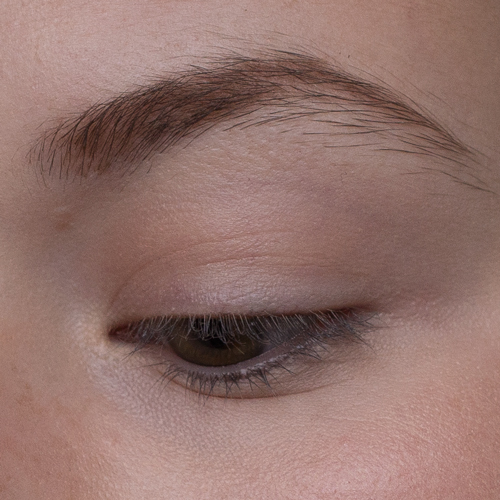
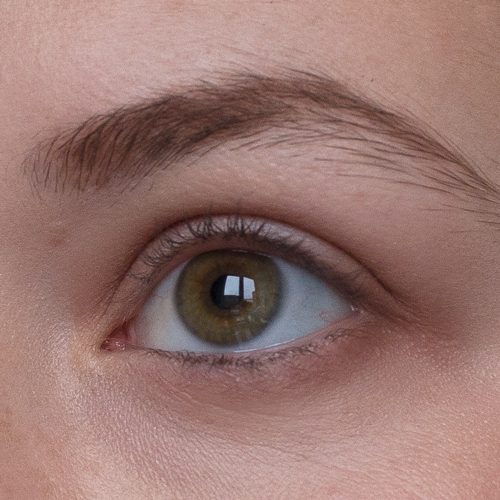
It's time to start working on the eyes! For this look, I want to do a soft brown smokey eye that will go with most holiday outfits and has less chance of making a mess than a full on black one. This is a simple an easy look that I like to whip out when I want to look sophisticated and not fuss for hours trying to achieve the best eye makeup the party has ever seen! Today I'm using 3 different palettes because I already had them an I'm a bit extra... but you easily find good drugstore palettes that will have similar shades to this! The stars of the show today will be the Tarte Tartelette in Bloom (TIB), Tartelette Tease and Marc Jacobs Eye-Conic in Scandalust.
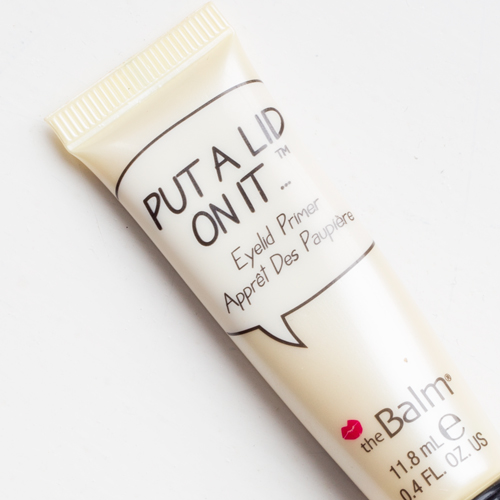
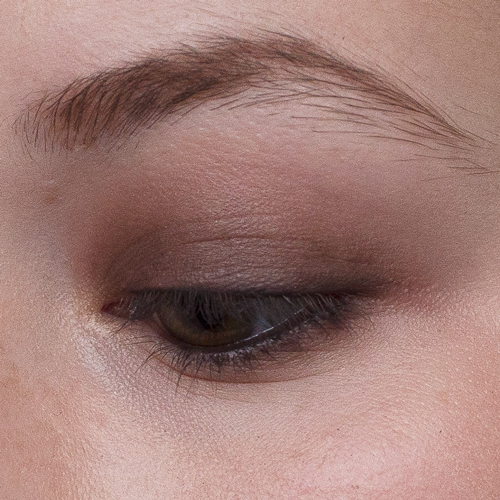
8. One very important step for the eye look to last is using an eyelid primer. If you don't have one concealer works great too! I'll be using the Thebalm Put a lid on it and I simply apply it using my fingers. Once that's done, I set it by loosely applying the shade Flower Child from the Tarte TIB palette in my crease. You can be generous with it as it's very light and mostly acts as a base. My favourite brush for this is the Morphe M330.
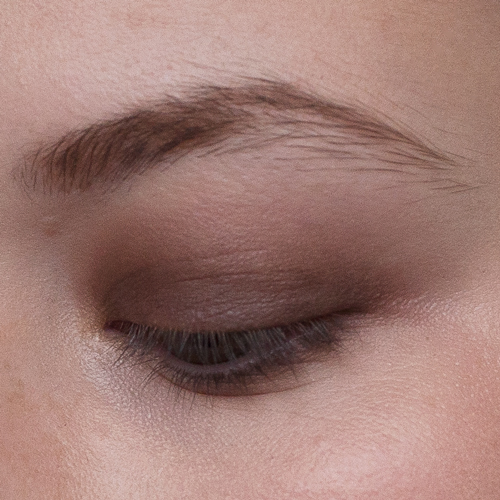
9. Next up, I want to deepen the colour inside the crease so I will go in with a smaller (but still fluffy!) Brush and use the shade That's Why from the Marc Jacobs Scandalust palette. I focus the colour in my crease at first, and then with the same brush and a light hand, I deposit some colour on my lower lash line to smoke things out. For this I like to use a smaller & more precise crease brush.
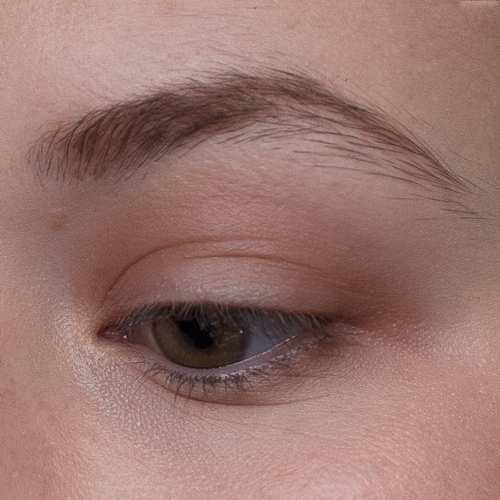
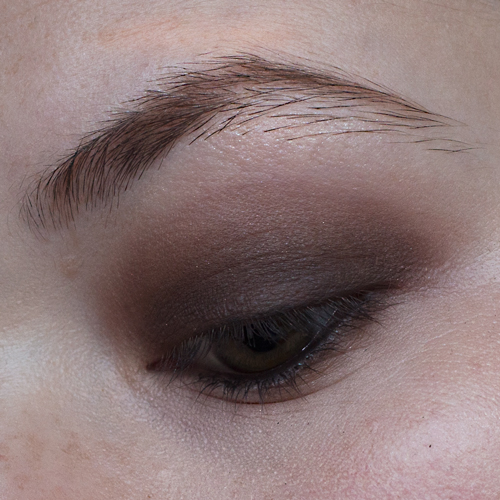
10. Now is when the real blending begins. I use a flat shader brush to apply the shade Heartbreaker from the Tease palette all over my eyelid. I really pack on the shadow at this point to get it dark and even, and go back in with the more precise brush from before an start blending in the crease. I go back and forth between the brushes until I get a nice result. Then I do the same on the lower lash line, adding the dark shade a little at a time to avoid making a mess!
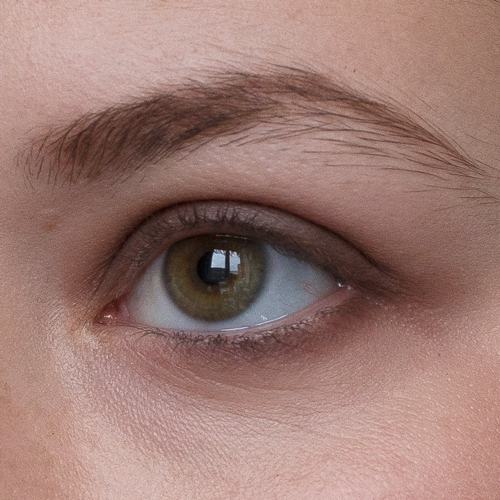
11. I find what really pulls the look together is the eyeliner. I use the brown Urban Decay 24/7 waterline pencil on my waterline (what a surprise!). I like this one because it stays quite well, but the most important part is to use a brown liner, it's softer and blends in better with the look. On my eyelid I'm actually going to use a small angled brush and use the shade Smokeshow (TIB) all along my lashline.
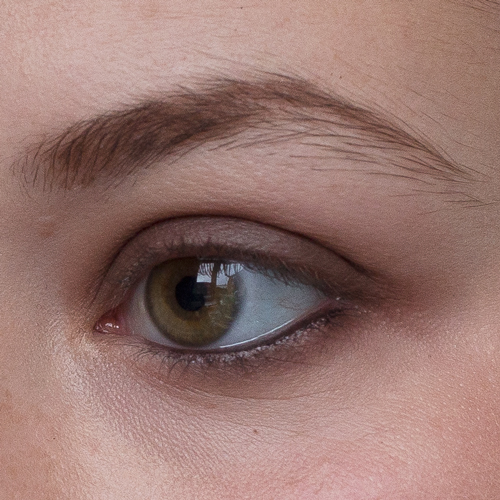
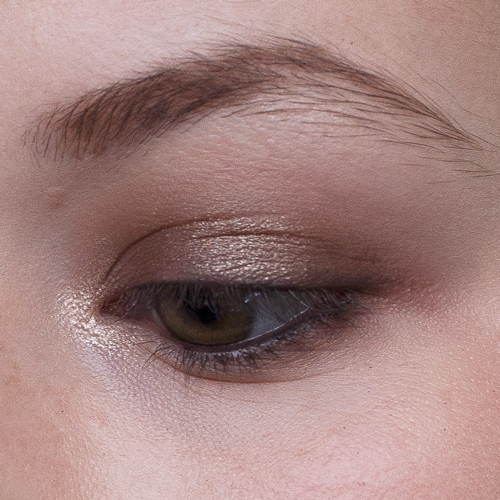
12. GLOW! Time to highlight the eyes. I used the shade Hot Pants from Marc Jacobs on my brow bone. I like my inner corner highlight to shine like nothing else, and for me the best way to achieve this is to use a cream shadow. I use one from Kiko Cosmetics that lasts seemingly forever as my eyes can get very watery. When it comes to highlight, I say be liberal and apply as much as you want!

13. The last step for the eyes is to add the finishing touches. On my lids, I use my fingers to apply the Maybelline Color Tattoo in the shade Bronze. This cream shadow will add a bit of light and dimension to your dark eye look. And to finish everything, I apply mascara to my lashes! The only type of mascara that doesn't smudge on me is tubing mascara, which isn't so great for the environment so I'm currently looking for a better option. Mascara is quite personal, so for an evening look my only advice is to go with a tried and true one you know will work for you.

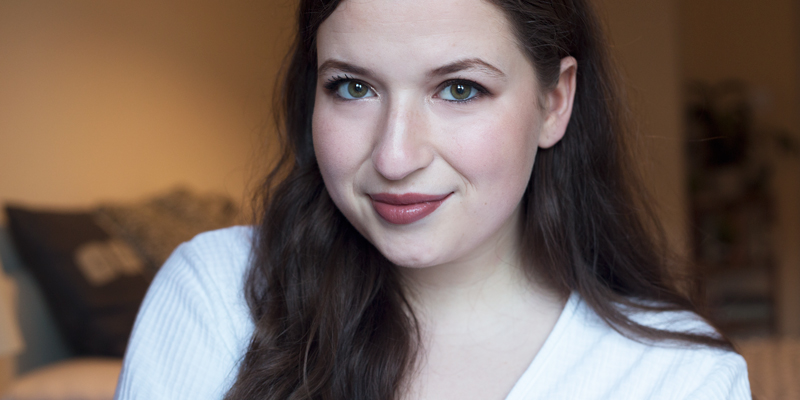
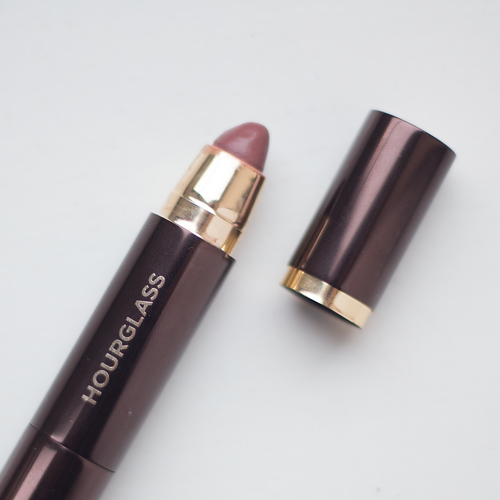
14. I always like to keep the lips for last for some reason! Loads of different lip colours would work with this look, but this time I chose to go with a deep nude. I went with the Hourglass Girl Lip Stylo in the shade Achiever. I love these lipsticks because they are very hydrating and even though they are not long wearing, they fade very gracefully and are easy to reapply during the night.

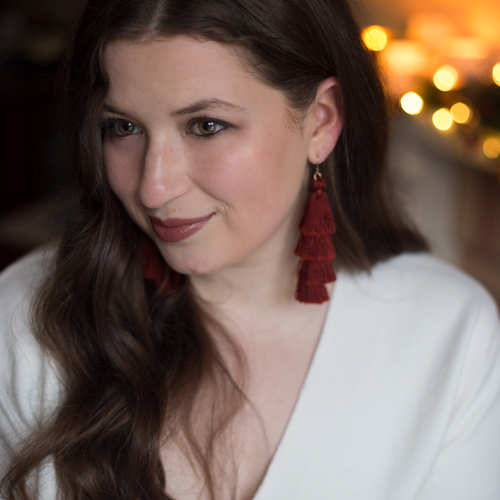
15. Ta da! The look is done! One last important step is to lock everything in place. It might be a bit extra but I like to use 2 different setting sprays to do this... I have very dry skin so I like to use some Mac Fix+ first, which will melt all the makeup together and take away the powdered look. Once that's done I will finish everything by spraying the Urban Decay All Nighter setting spray, which is incredible at prolonging the wear of makeup. All that's left to do is to get dressed and get out the door!